

Originally published Aug 28, 2016.
Planemaking
I’m using the approach to learning where you attempt to fail as much as possible. The goal is not to fail, that’s just a mechanism to increase the learning rate. I’m using this to learn to make handplanes.
I’ve always been intrigued with the idea of making handplanes. The top woodworkers I know all do it and the planes seem really cool and functional. However, I have also been intimidated by the process. Handplanes seem hard to make. Now that I’m older and not as intimidated by learning, I’m trying to learn how. Here’s the current state of my abilities. This is a build log of the latest plane I made.
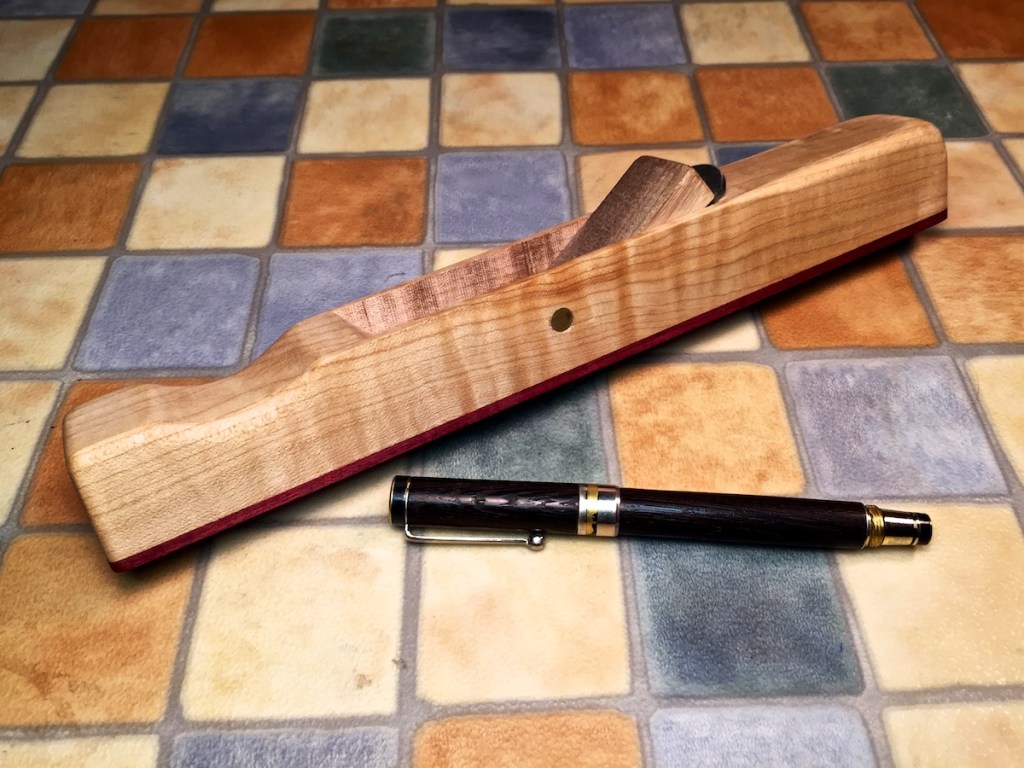
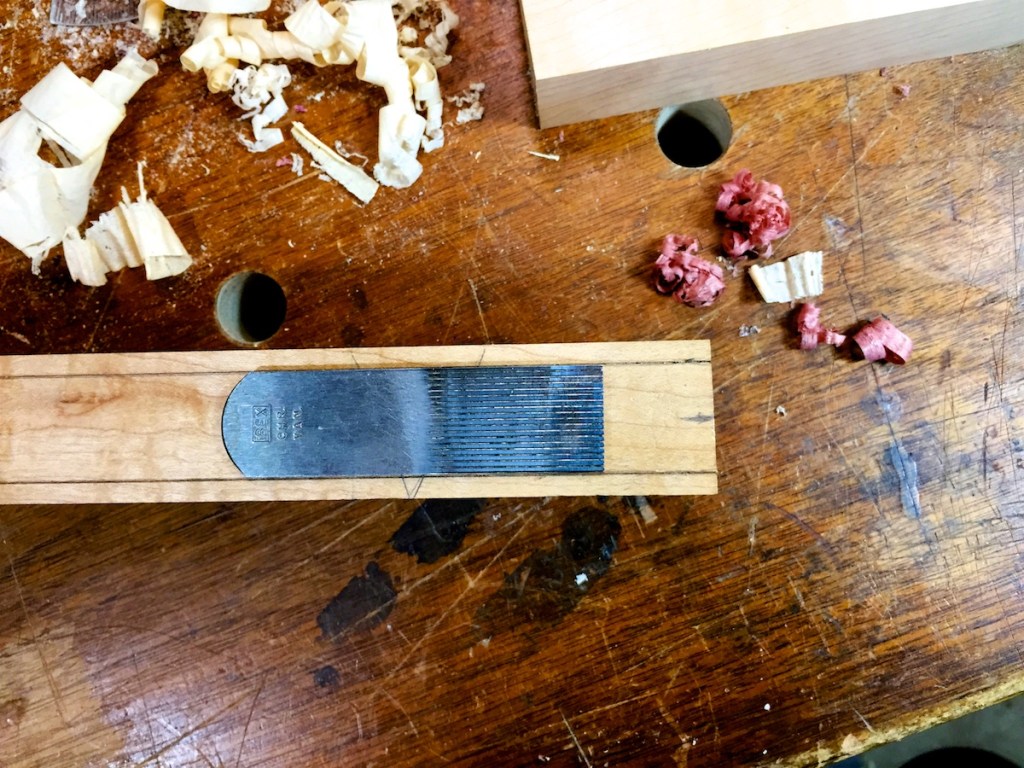
I started with a blade, you can see it on the right. I’ve had this for a long time hoping I’d be able to use it. Then I found some nice scraps of wood. The body is curly maple and the sole is purpleheart. Yes, purpleheart is a harder wood than maple. They are being glued here.
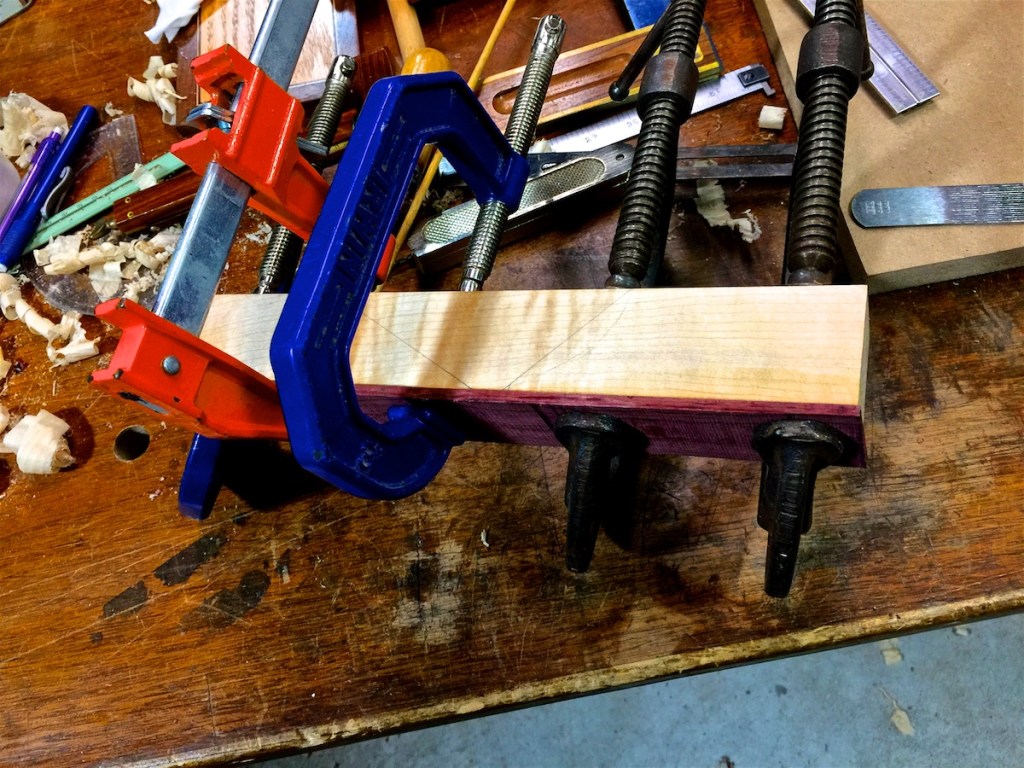
Next is to clean up the sides so the body and sole are the same size. I’m using my nice commercial plane to help make my planes.

I have to make the sole very flat and an even thickness.
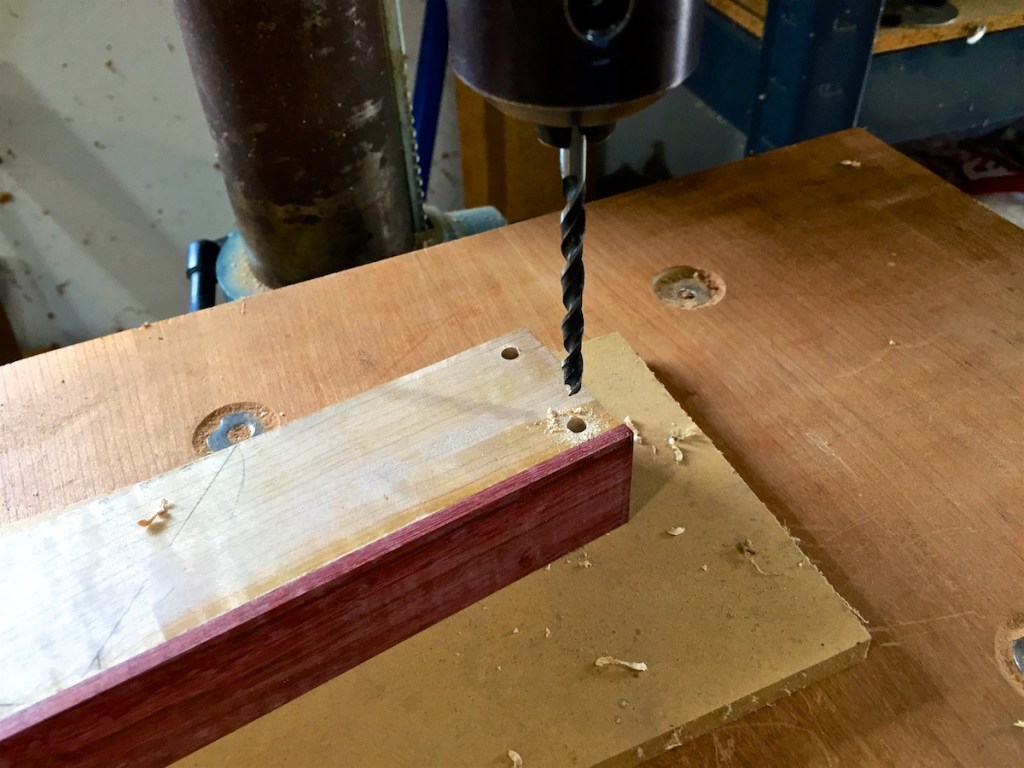
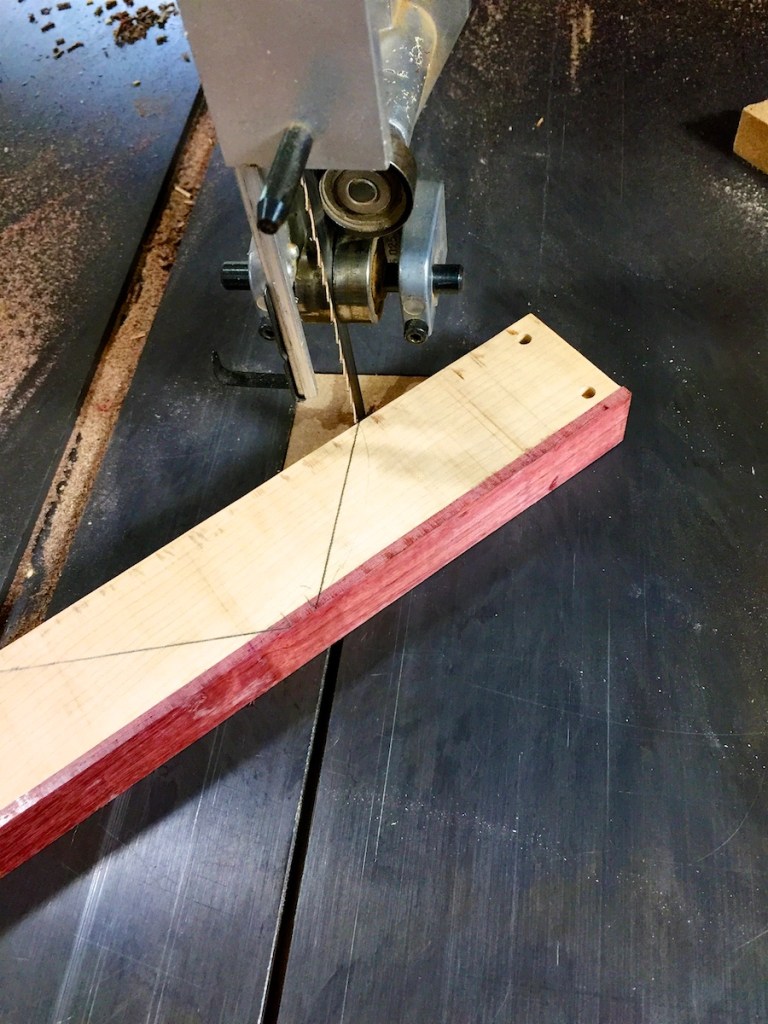
The common technique I’m using is to drill alignment holes. This helps with the final glue up of the plane.
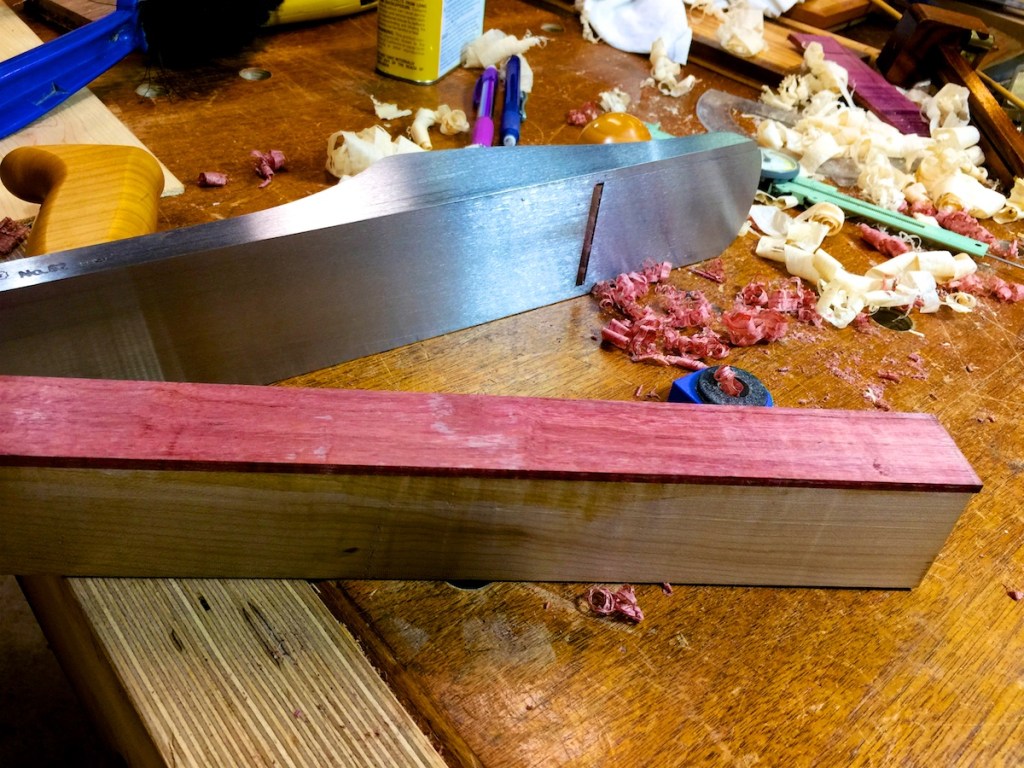
Now I have to mark the sides that will be cut off. The center section is sized for the blade. This is a ridged blade that’s good for cleaning up very rough lumber.
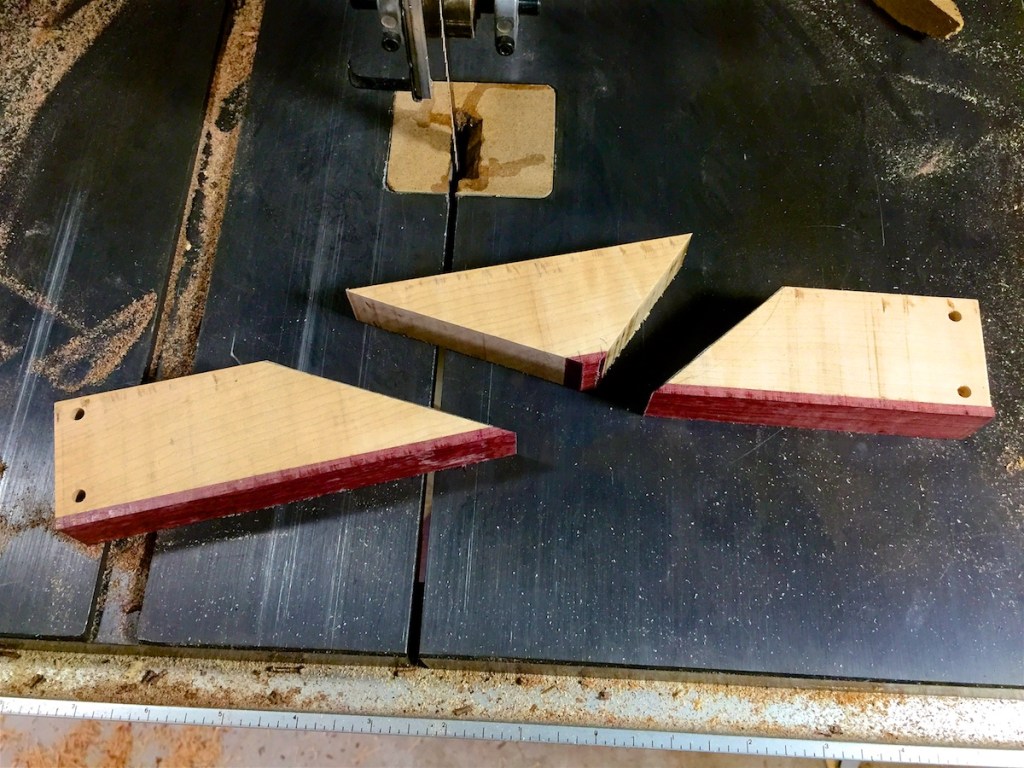
To the bandsaw to cut the sides. It’s nice having good tools and it’s good to be using them again.
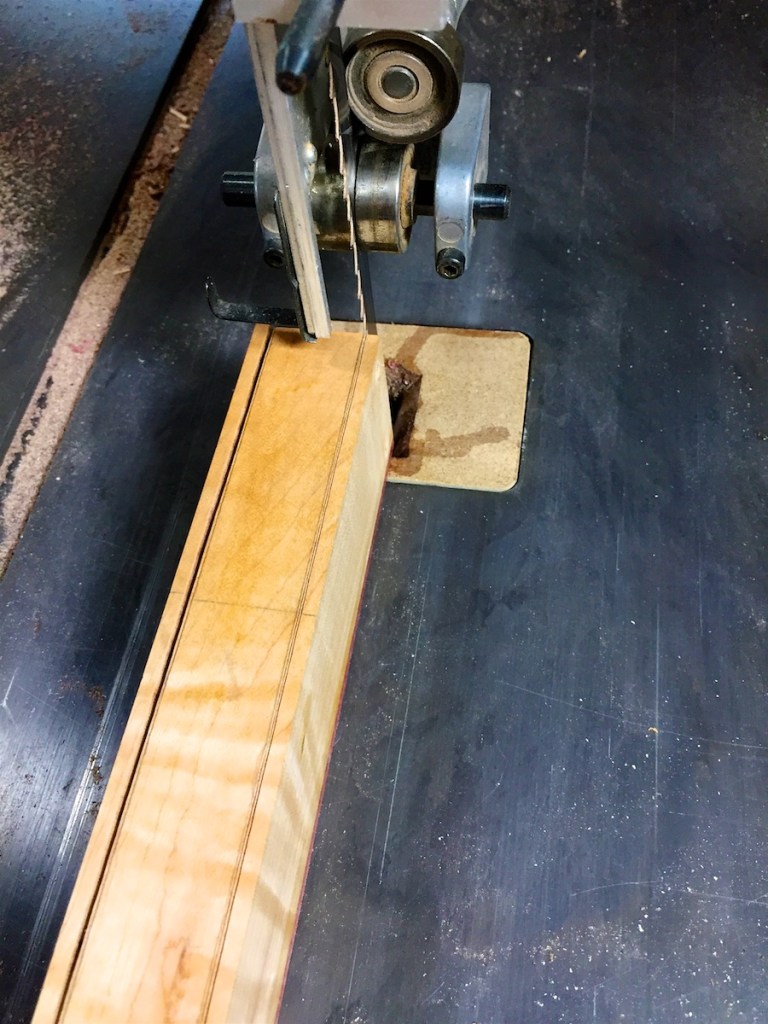
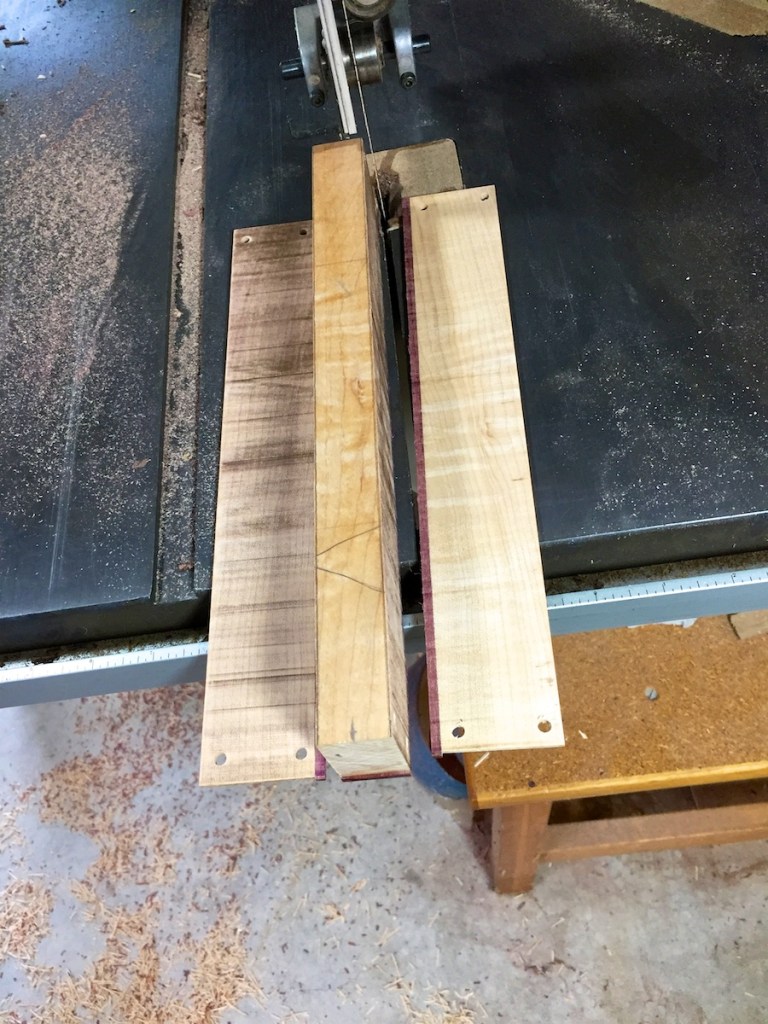
The sides are cut. This blades burns one side of the cut. I haven’t been able to adjust it to eliminate the burning yet. It might be the blade and not the saw.
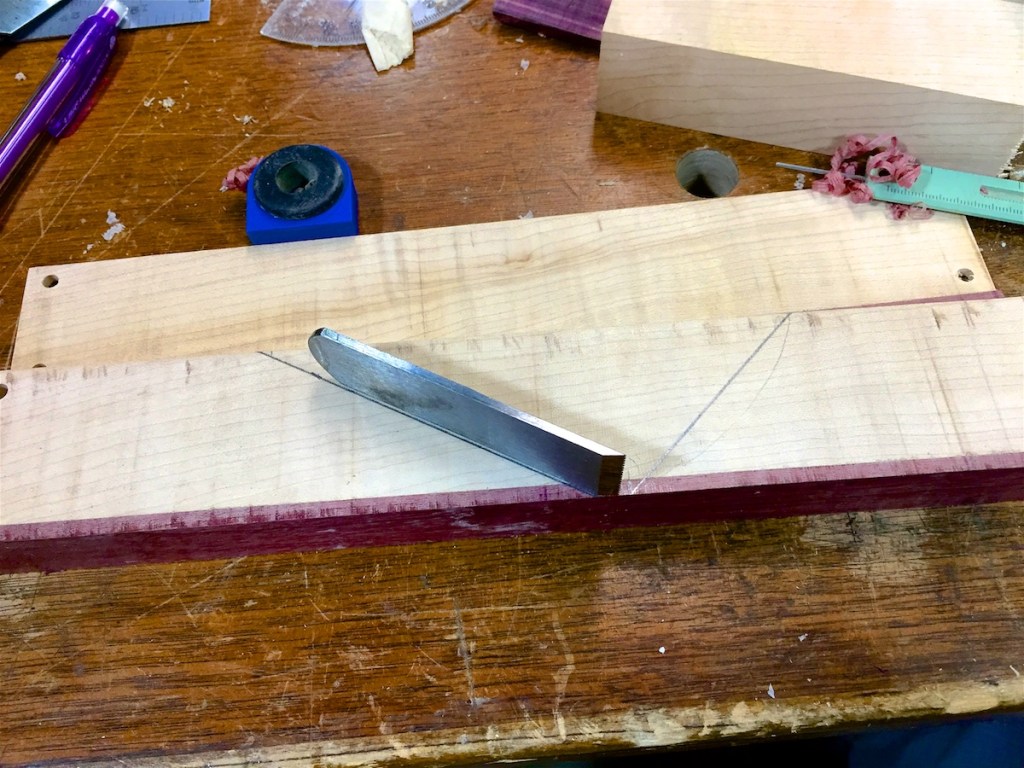
Next is the tricky part of marking the angle cuts. One of them has to be a slightly larger angle than the blade’s primary bevel. The other is not critical as it’s just for chip clearance.
Back to the band saw to cut the angles.
Done with those cuts. The center section is waste.
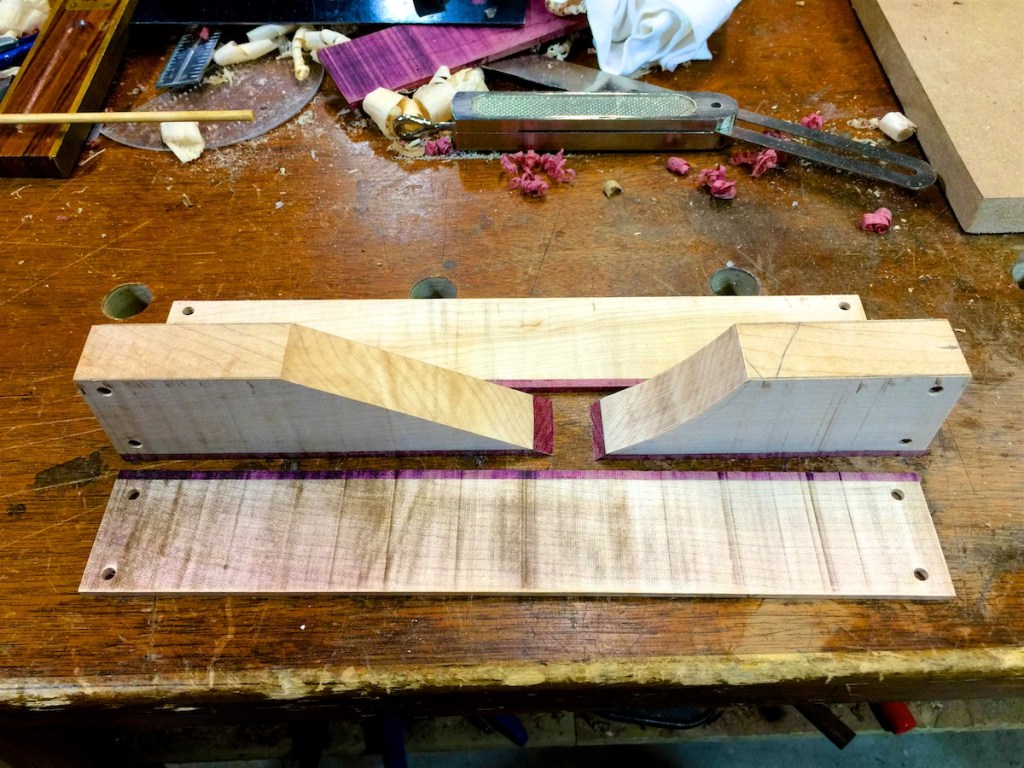
All set up for gluing. You can see why the alignment holes are used here. I will hammer short dowels into all the holes and the plane is magically aligned. It’s like magic!
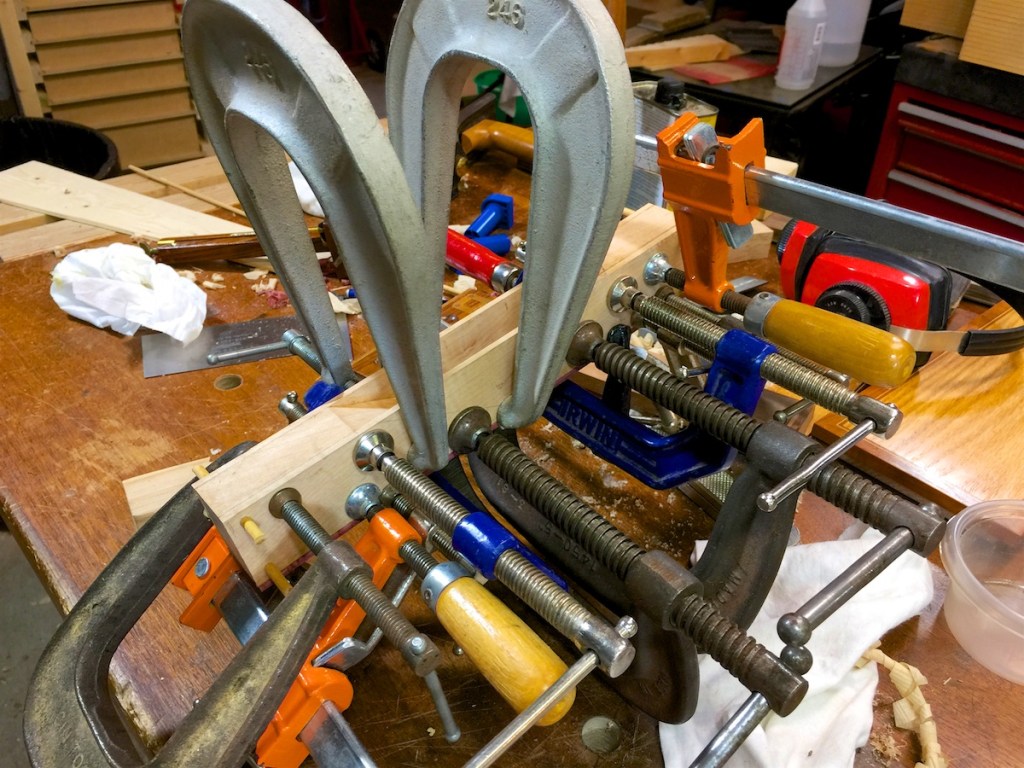
All glued up. You can see the alignment dowels here.
And here’s the final plane again. The rounding in back and carved section in the front are for comfort. I kept rounding and carving until it felt good.

Wrap Up
What did I learn from this one?
I started this post talking about learning by failing. So, what wrong with this one? It’s about the eighth plane I’ve made and is the first larger one. Here’s the list of things that are not great or just plain wrong.
- I made the center section too wide. It should have been smaller for a tighter fit.
- I didn’t clamp between the alignment dowels. I assumed I’d be cutting off farther into the plane than I ended up doing. I had to do some filling and corrections because of this.
- The clearance angle I used was 45º. It could have been 30º and the plane would have been stronger and could have been shorter.
- The sides are a little narrow. To fix this I would have to use a thicker piece of wood to begin with.
- The angle for the blade was not quite steep enough. If it is not higher than the bevel angle the sharp tip of the blade won’t be touching the work. I had to steepen the angle with chisels and files. This was very time consuming but I’m glad it was possible.
This was the biggest handplane I’ve made. I’m gradually scaling up and plan on making full sized planes at some point. I’ve run out of the blades I had on hand and will have to get more. Buying high-quality plane blades, called irons, is a lot less money than buy high-quality planes.
-Eric
