

- Originally published June 18, 2018.
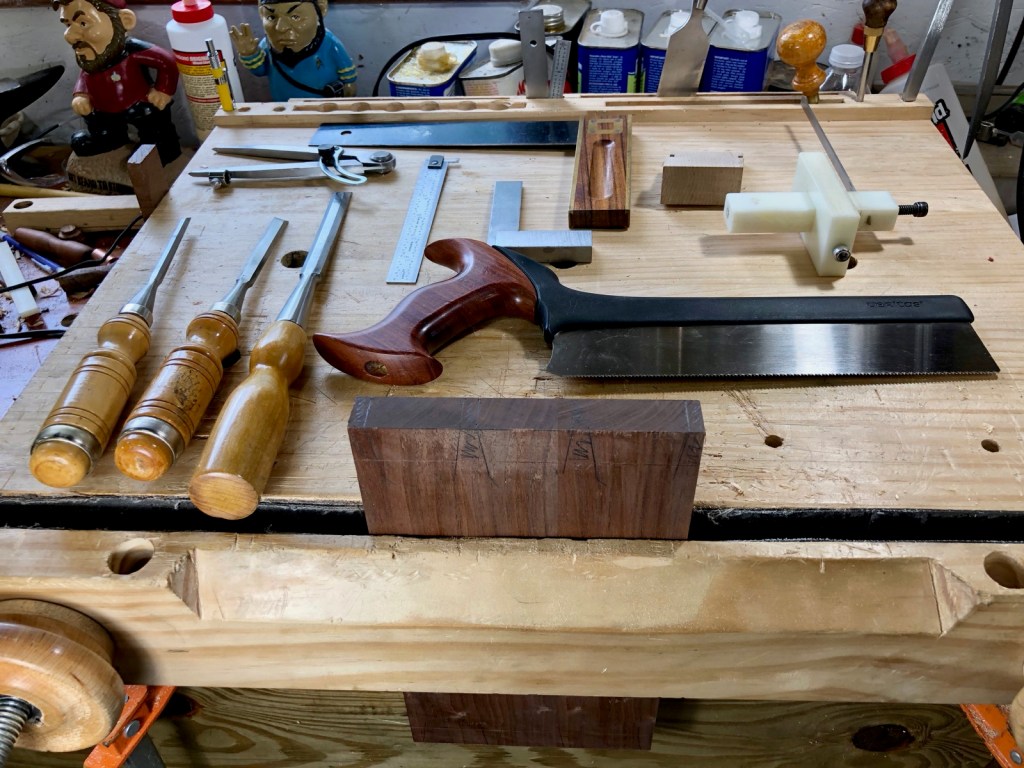
Here are today’s instruments of construction.
There are sharp chisels, my dovetail saw, my marking gauge, some squares, and a divider.
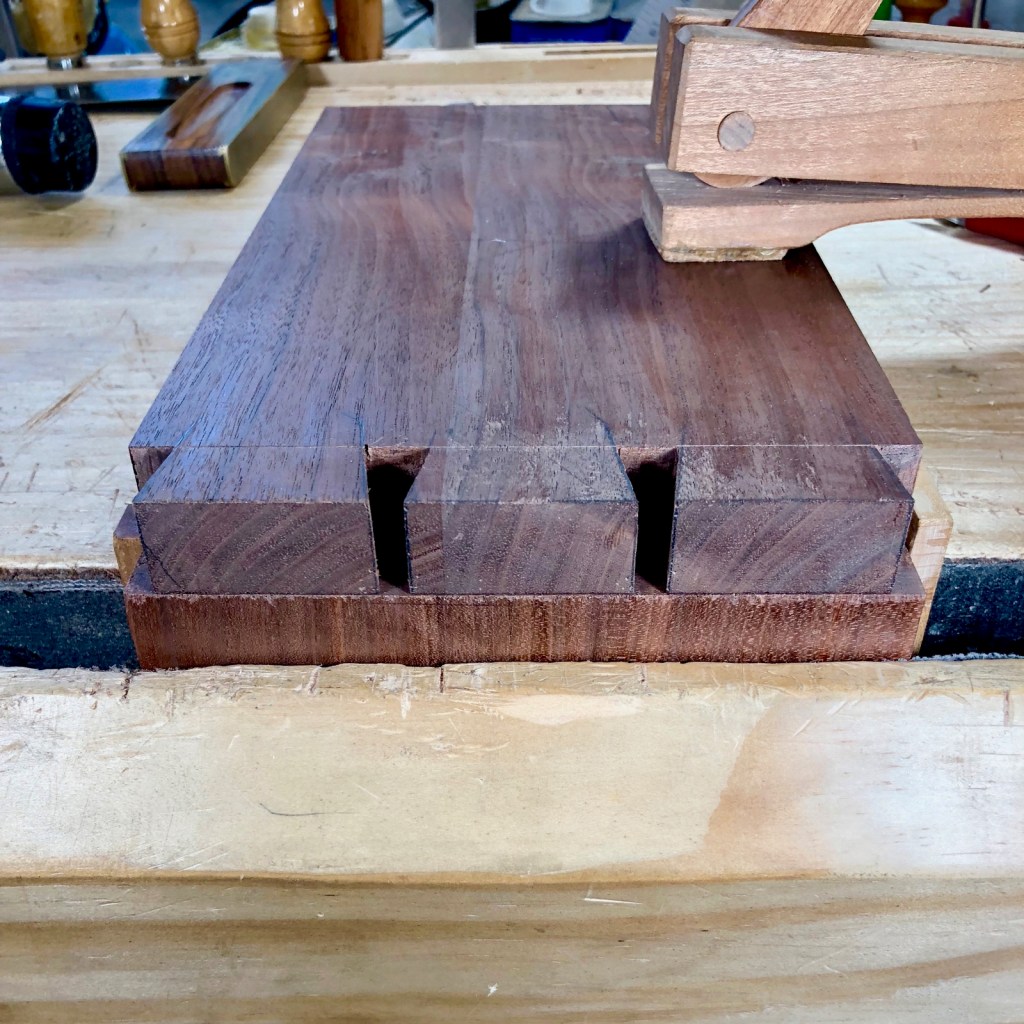
The front is in the vise ready for the tail part of the dovetails.
The first step is to cut precisely next to the lines I drew yesterday. This is done with a dovetail saw, a very exacting tool with a fine cut.
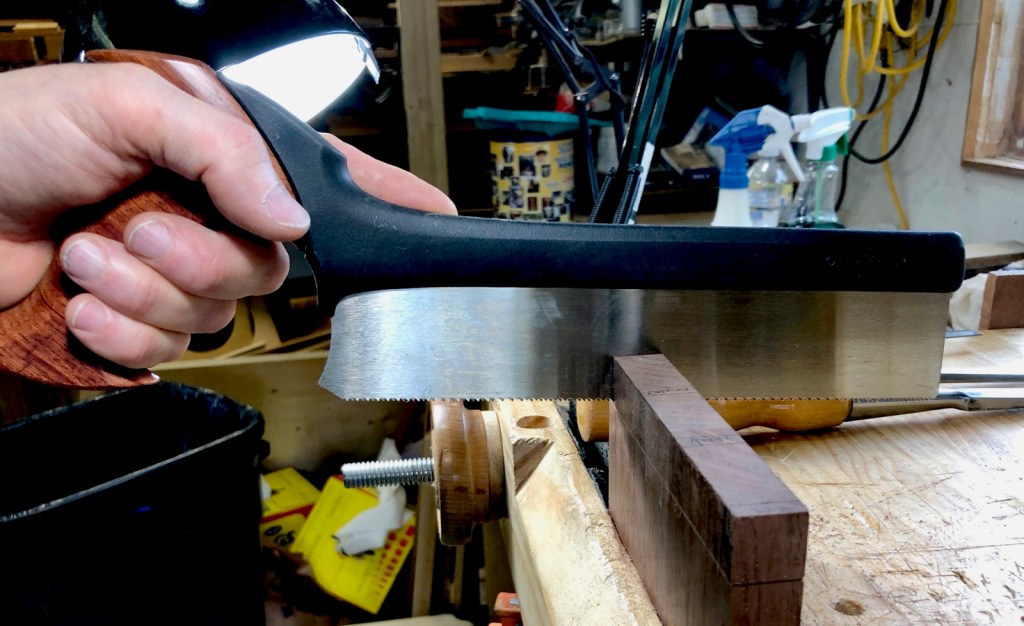
Real precision takes some practice. I’ve been working hard on doing these for well over a year. I’m starting to make fewer mistakes.

Once the sides are cut then the waste is cut and chopped out. Then I carefully trim them so the tails are all square.
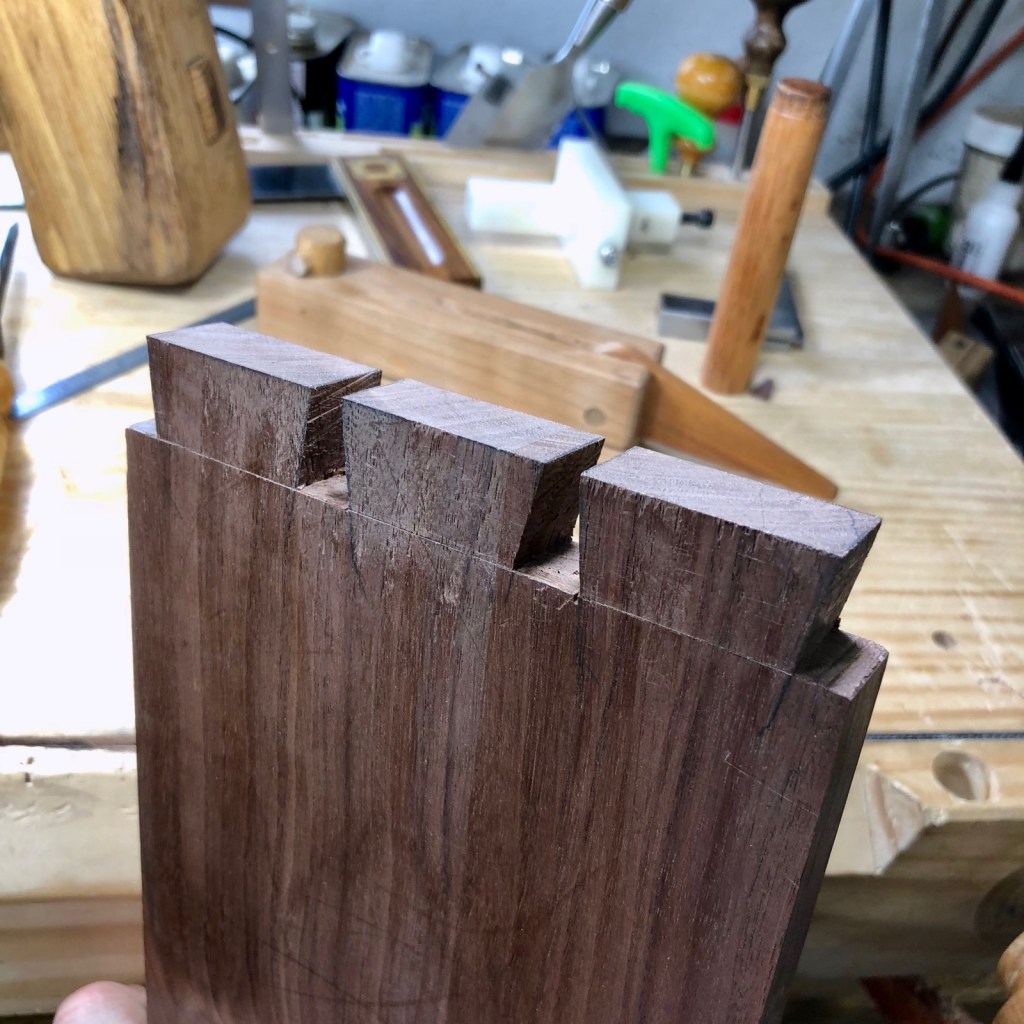
Now comes the hard part. The side pieces have to have corresponding pins cut that are the exact right shape.
I start working on the pins by clamping the tails to the sides.
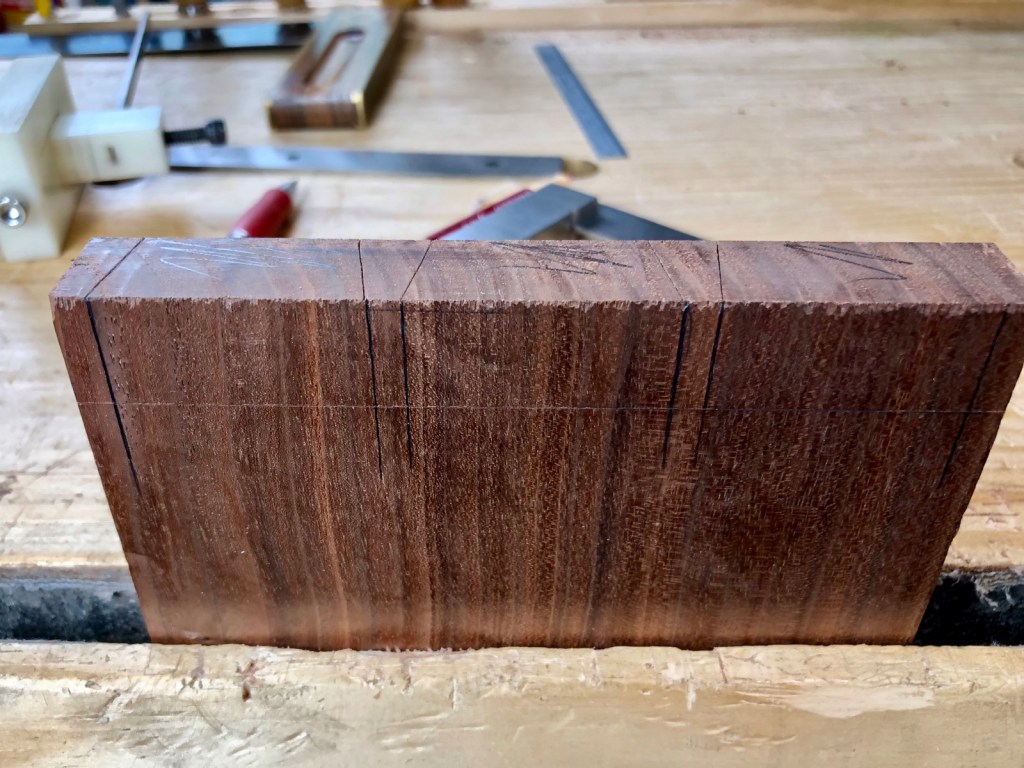
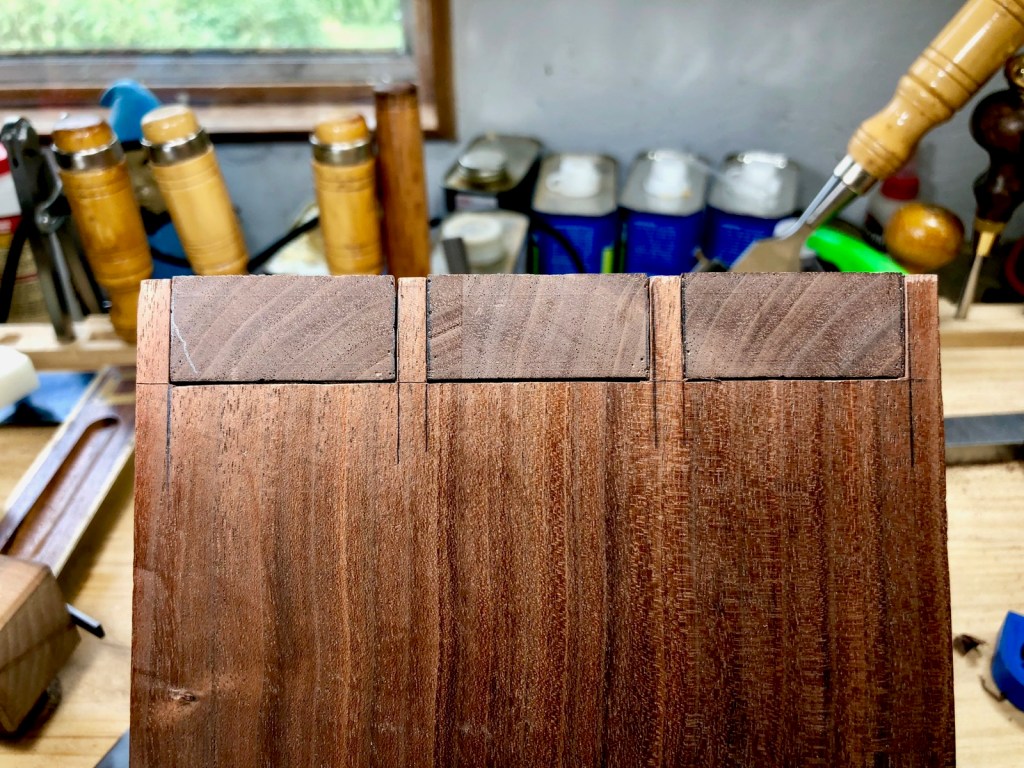
Then I use a marking knife to scribe the pins using the tails as the template.
If I’m precise with this step then we have perfect pins marked out.

The next step is to draw lines down from the top of the pins that start from the scribed lines.
Notice that I mark the section of wood that will be removed. This is a habit gained from getting tired and confused, and cutting the wrong part. It happens to almost every woodworker at some point.
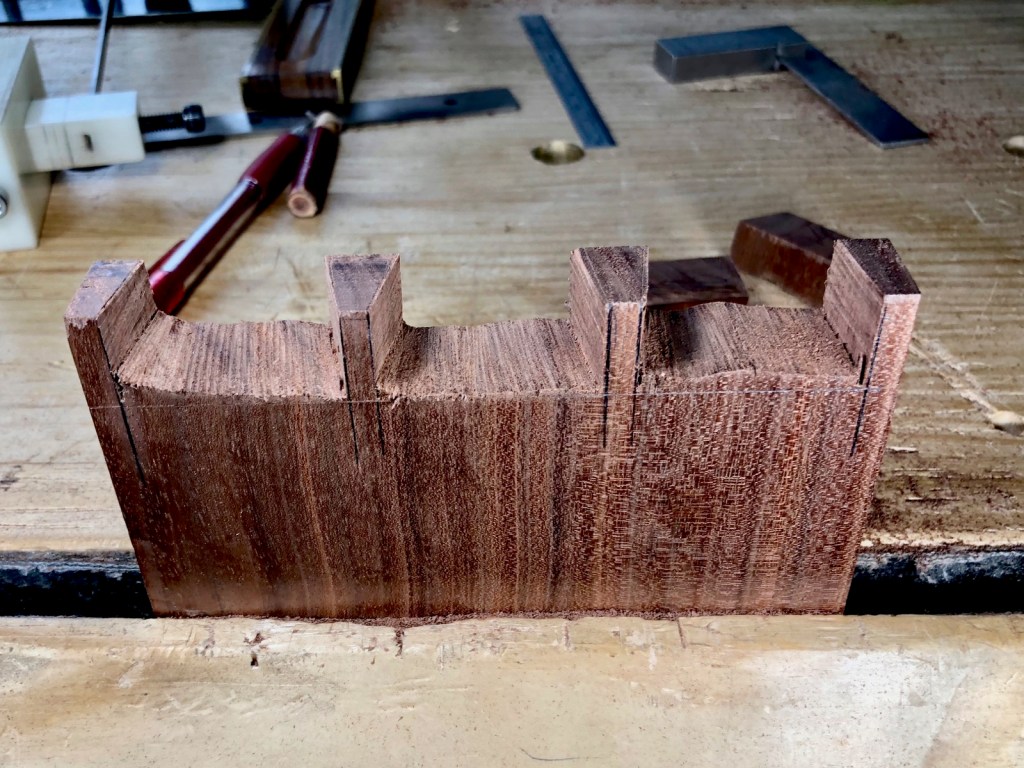
Then I use my dad’s coping saw to cut out the waste of the pins. The cut is above the guide lines and can be fast and sloppy.

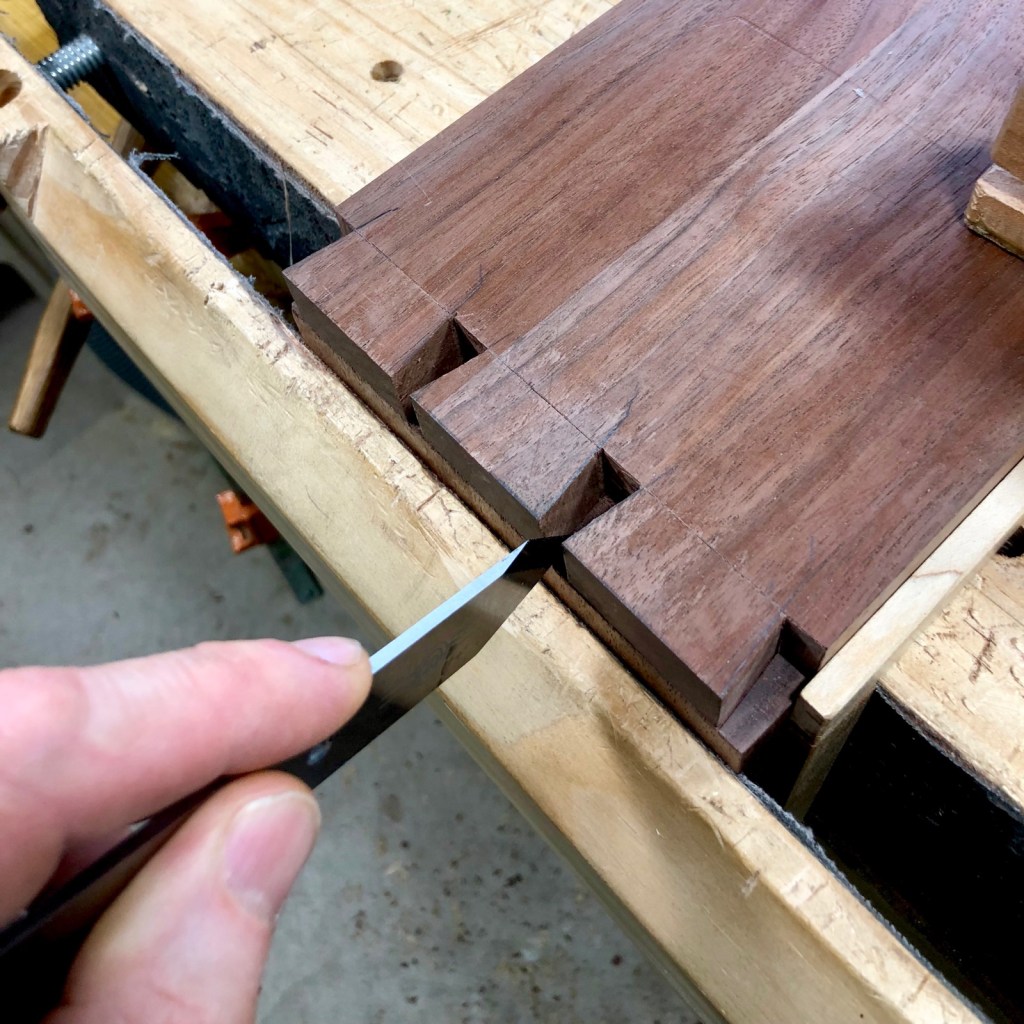
Now we have pins that are close to the right size and are ready for sharp chisels to go to work.
First, I clear out the rest of the waste left by the coping saw. This is done carefully to preserve the guideline.
Fitting the pins to the tails can be tricky. The closer to the lines you cut the less you need to trim, but the higher the risk of cutting too much.

The pins are carefully trimmed with chisels. Once the tails start to fit into the pins then tiny pieces of wood are pared away and the tails start going farther into the pins.
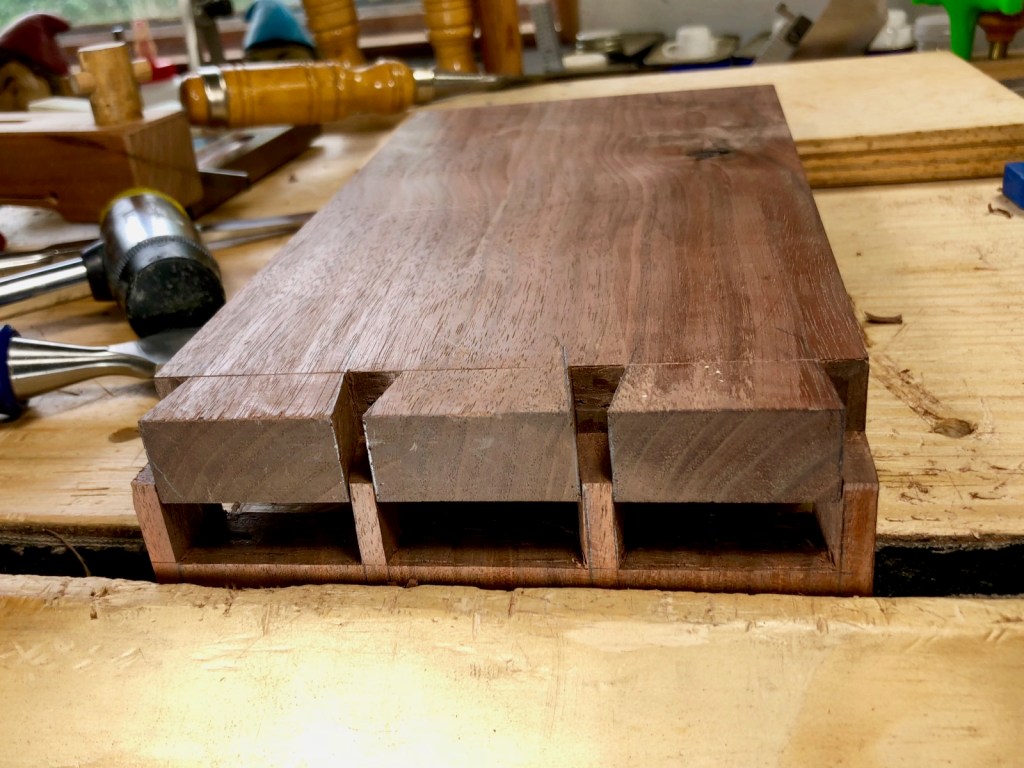
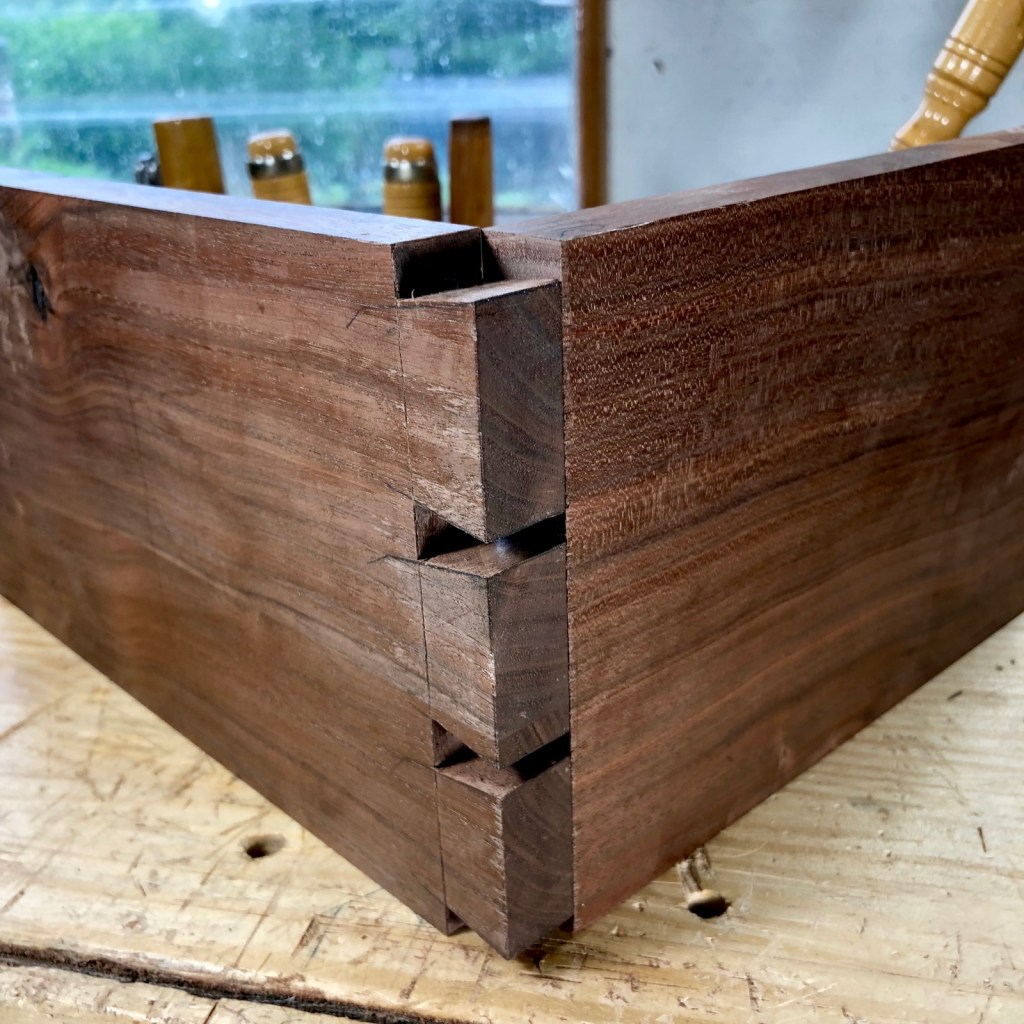
When they tapped into place with very little force it’s time to trim the bottom of the pins for a tight joint.
Now I just have to repeat this for the other three corners of the box. This is a very satisfying joint that is strong and looks great. It’s been used in woodworking for hundreds of years.

