

The Top Sliding Dovetails
The mortises for the straight tenons were cut but we can’t fit them until the sliding dovetails are cut as well.
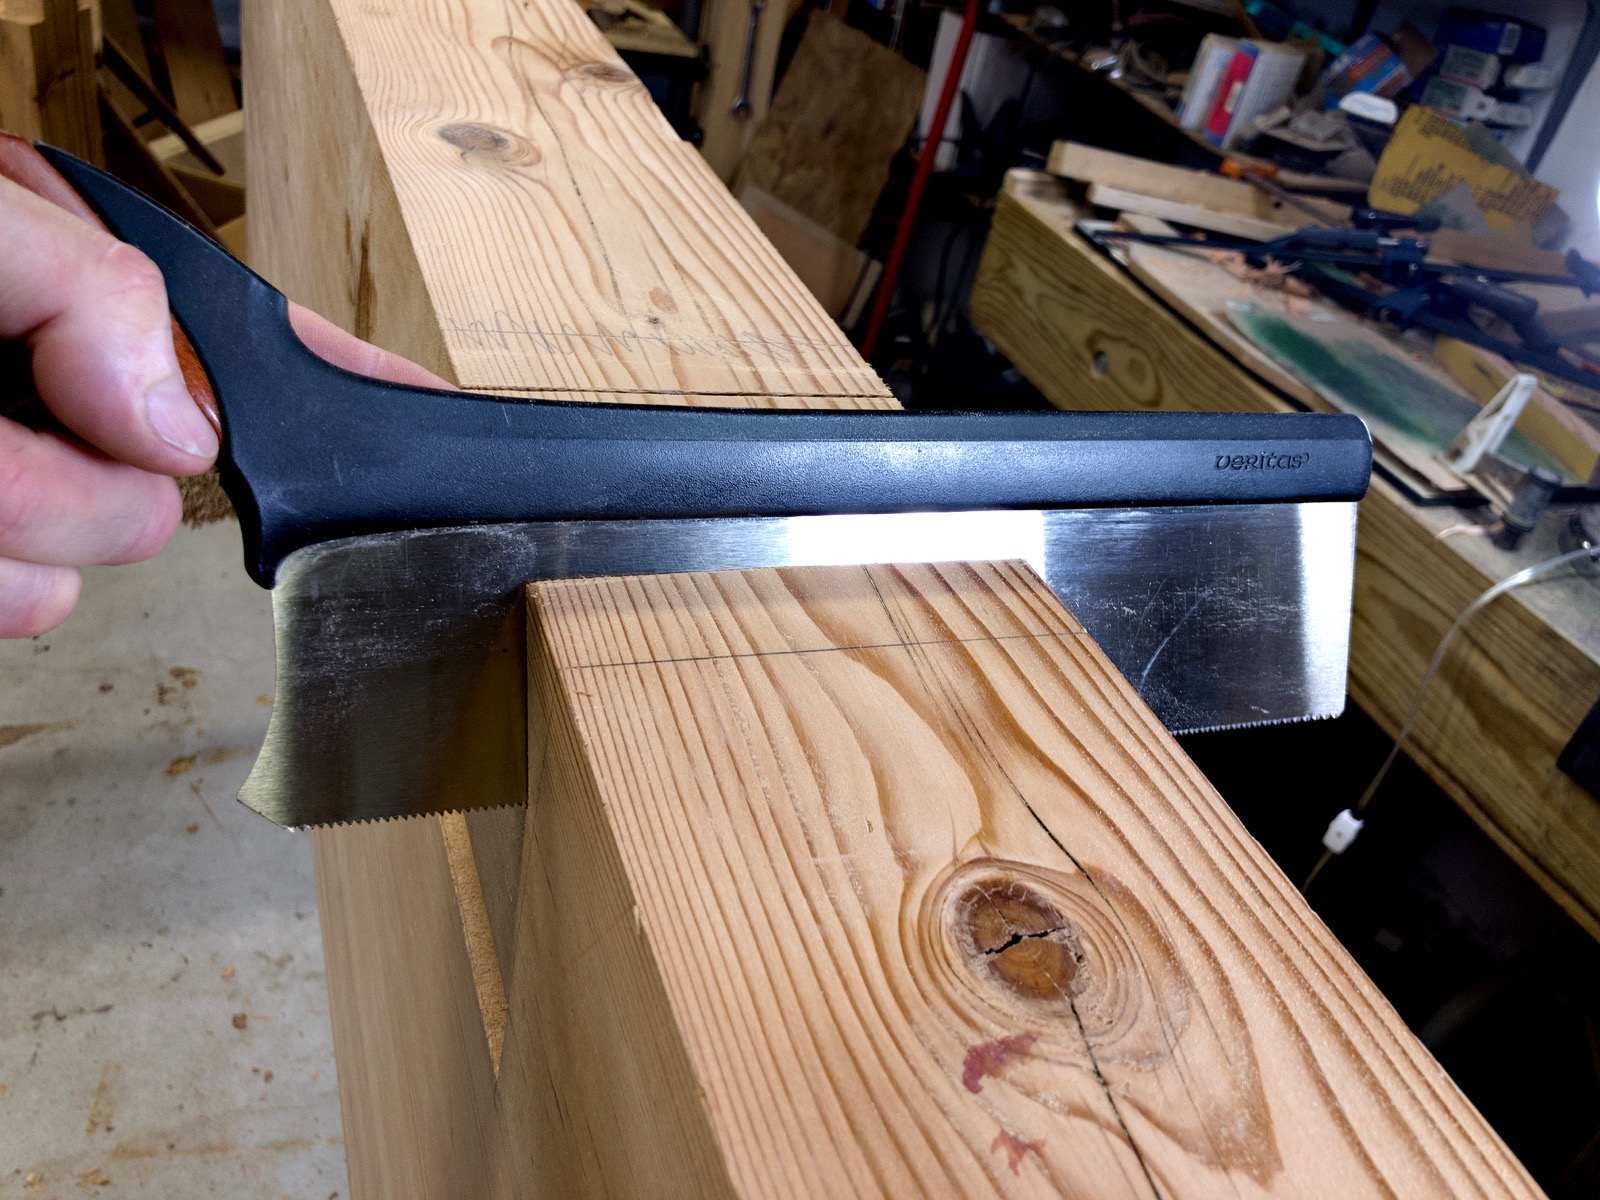
I started by cutting a knife wall for the saw to follow.

The cut starts with the saw vertical until it can be tilted to the angle of the dovetail.

It ends up being about 1/8" before I can turn the saw.

Then I cut down the front where I can see where the cut is going. Then I repeated this from the other side.

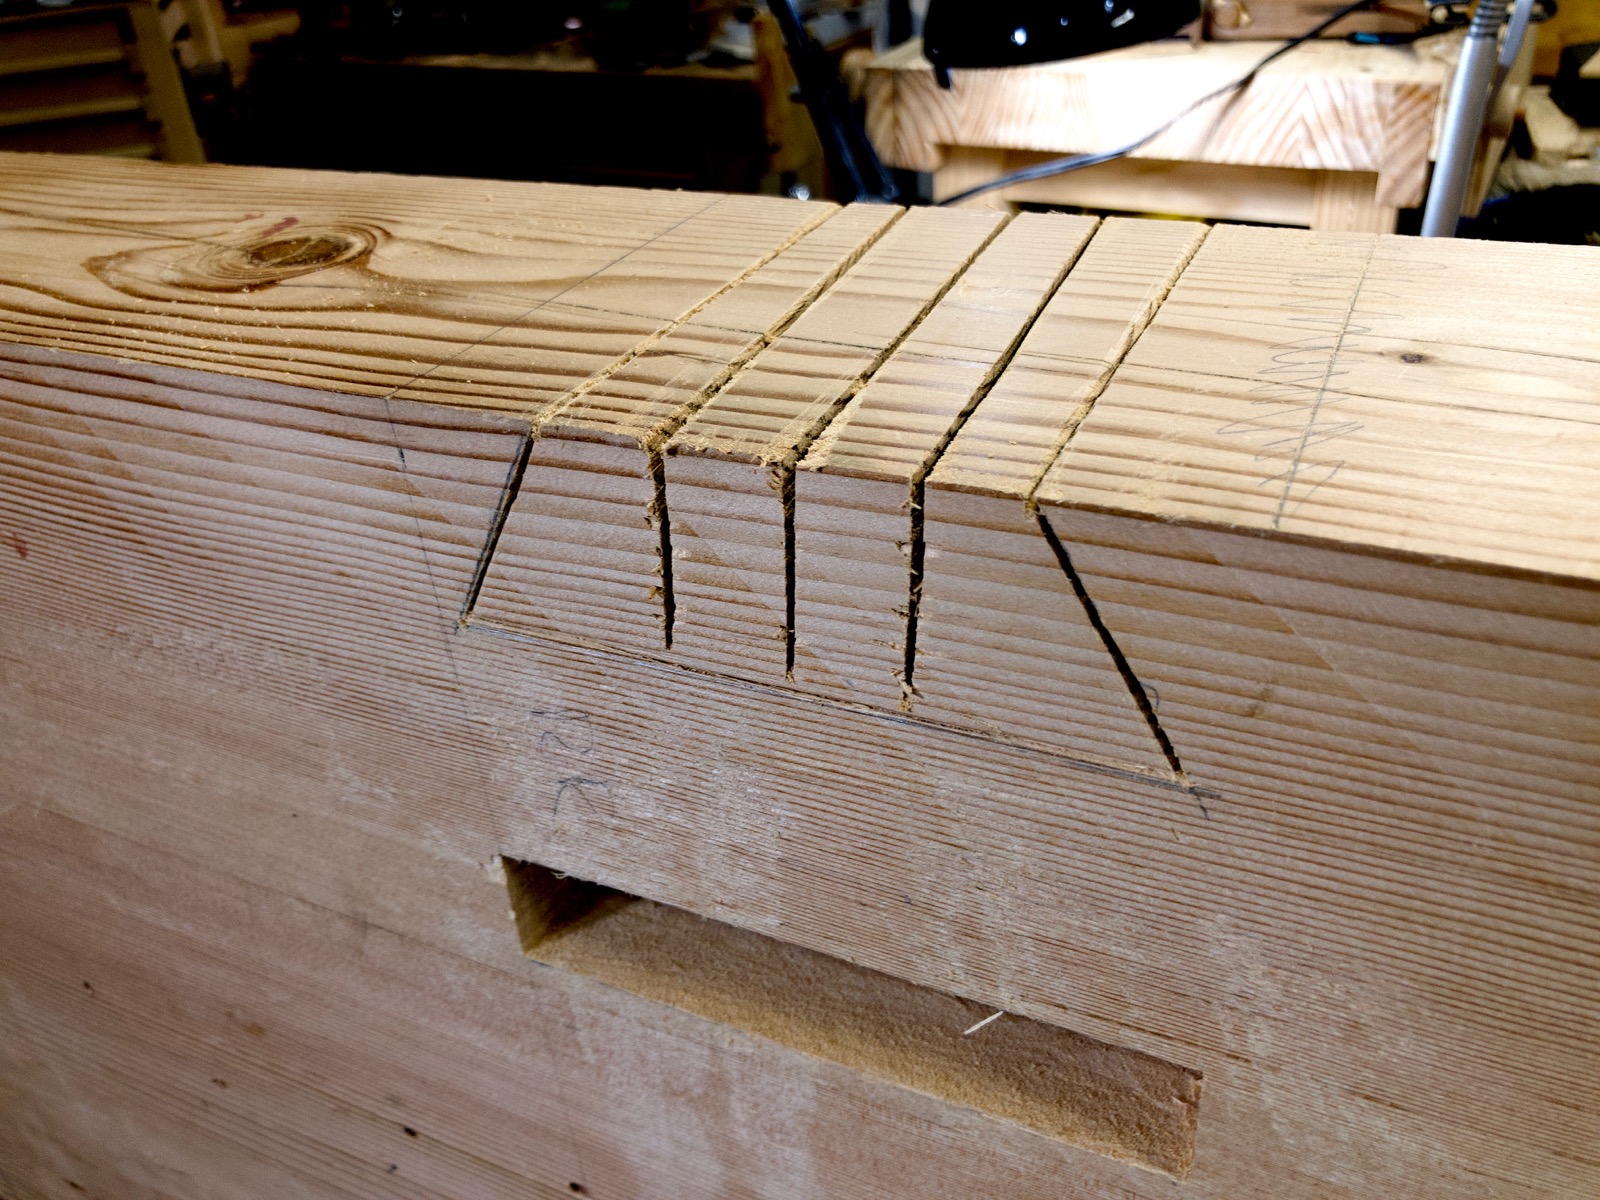
Once both side are cut down to the line the middle is cleaned out.
A few cuts in the middle of the waste allows for chip clearance.
I got to whack out most of the wast with a chisel and a hammer. That was fun and fast.

I chopped out most of the wast down to very close to the final line.
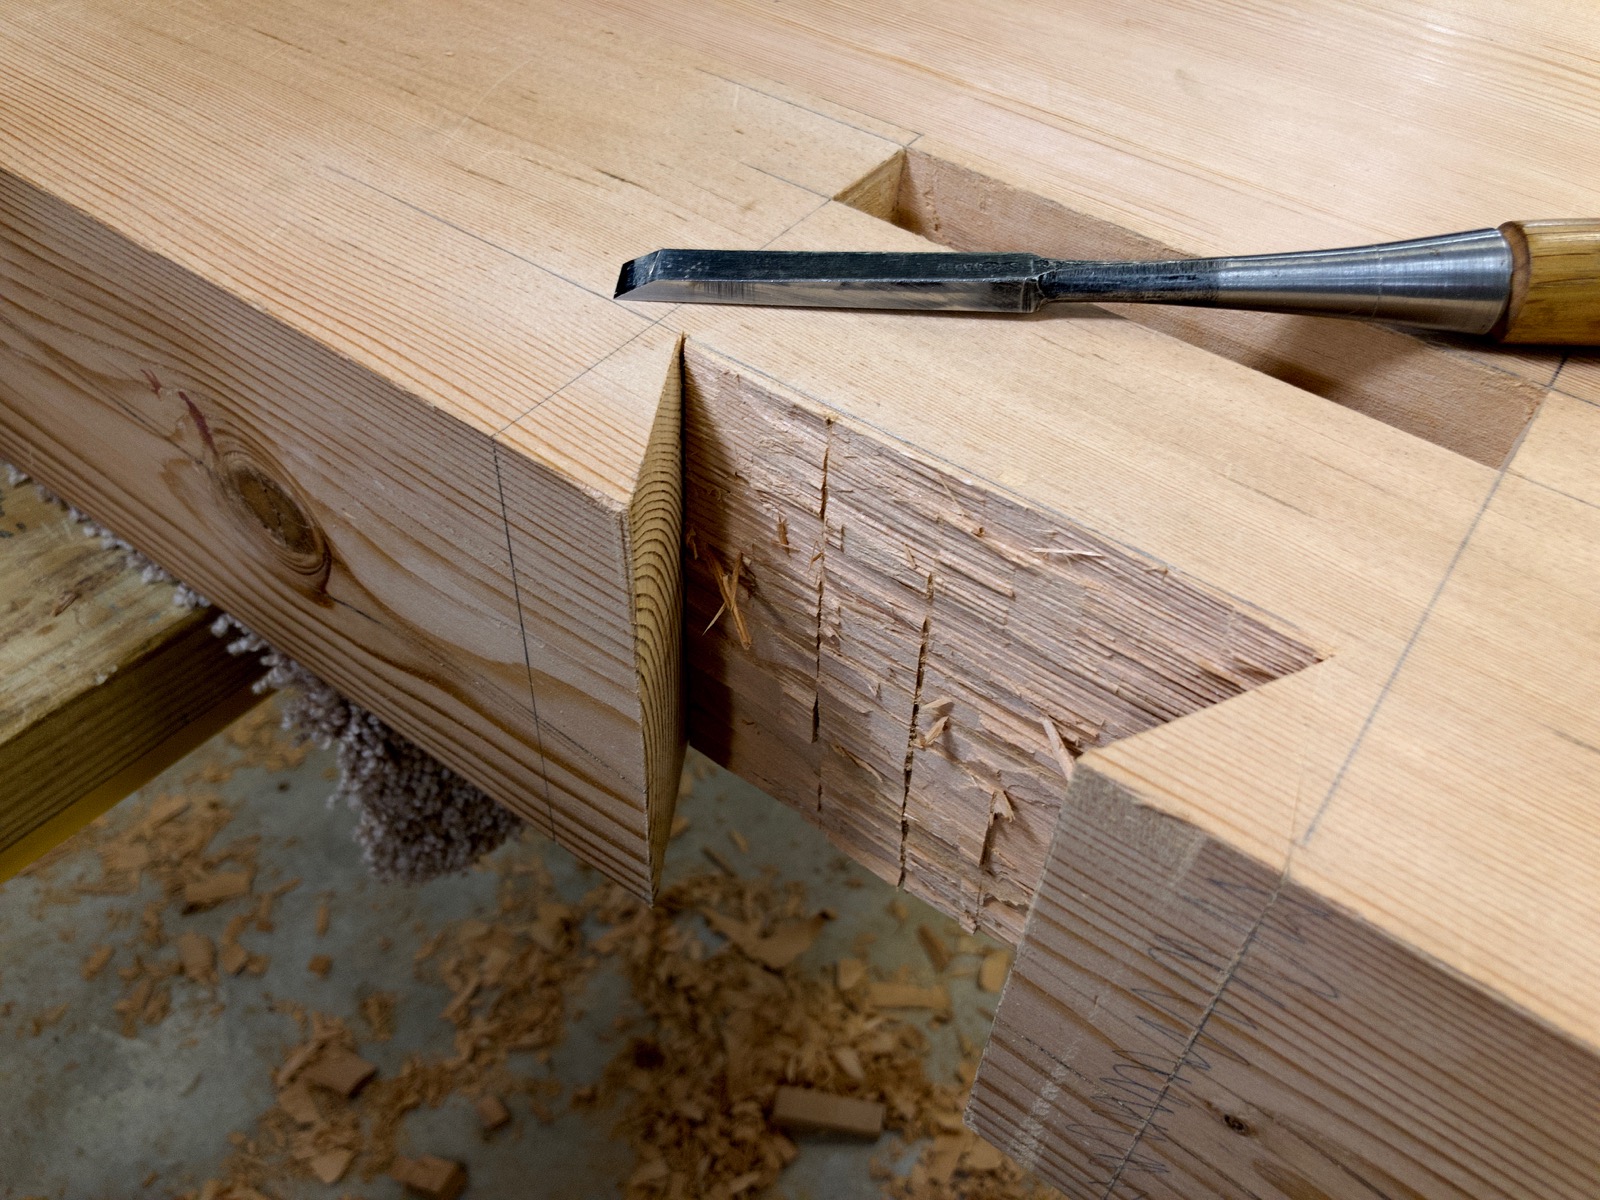
Here I switched to paring the side and bottom with chisels and floats. The leg starts fitting into the mortises and goes farther as I pare down.

When I got close to having the first leg fitted it was pretty exciting. This is a large and very strong joint.

The first one is seated! This was a great milestone. The joint seems intimidating when you first see one. They do take some care but aren’t that bad really.

The top of the joint extends through the top and will be trimmed after everthing is glued up.

Here’s a video of the joint in action.
At this point even with no glue this joint is very solid. It won’t wiggle at all.

I repeated the joint for all the legs. The second one went a little faster.

With all four joints cut the bench can stand on its own for the first time. That made the project seem real.
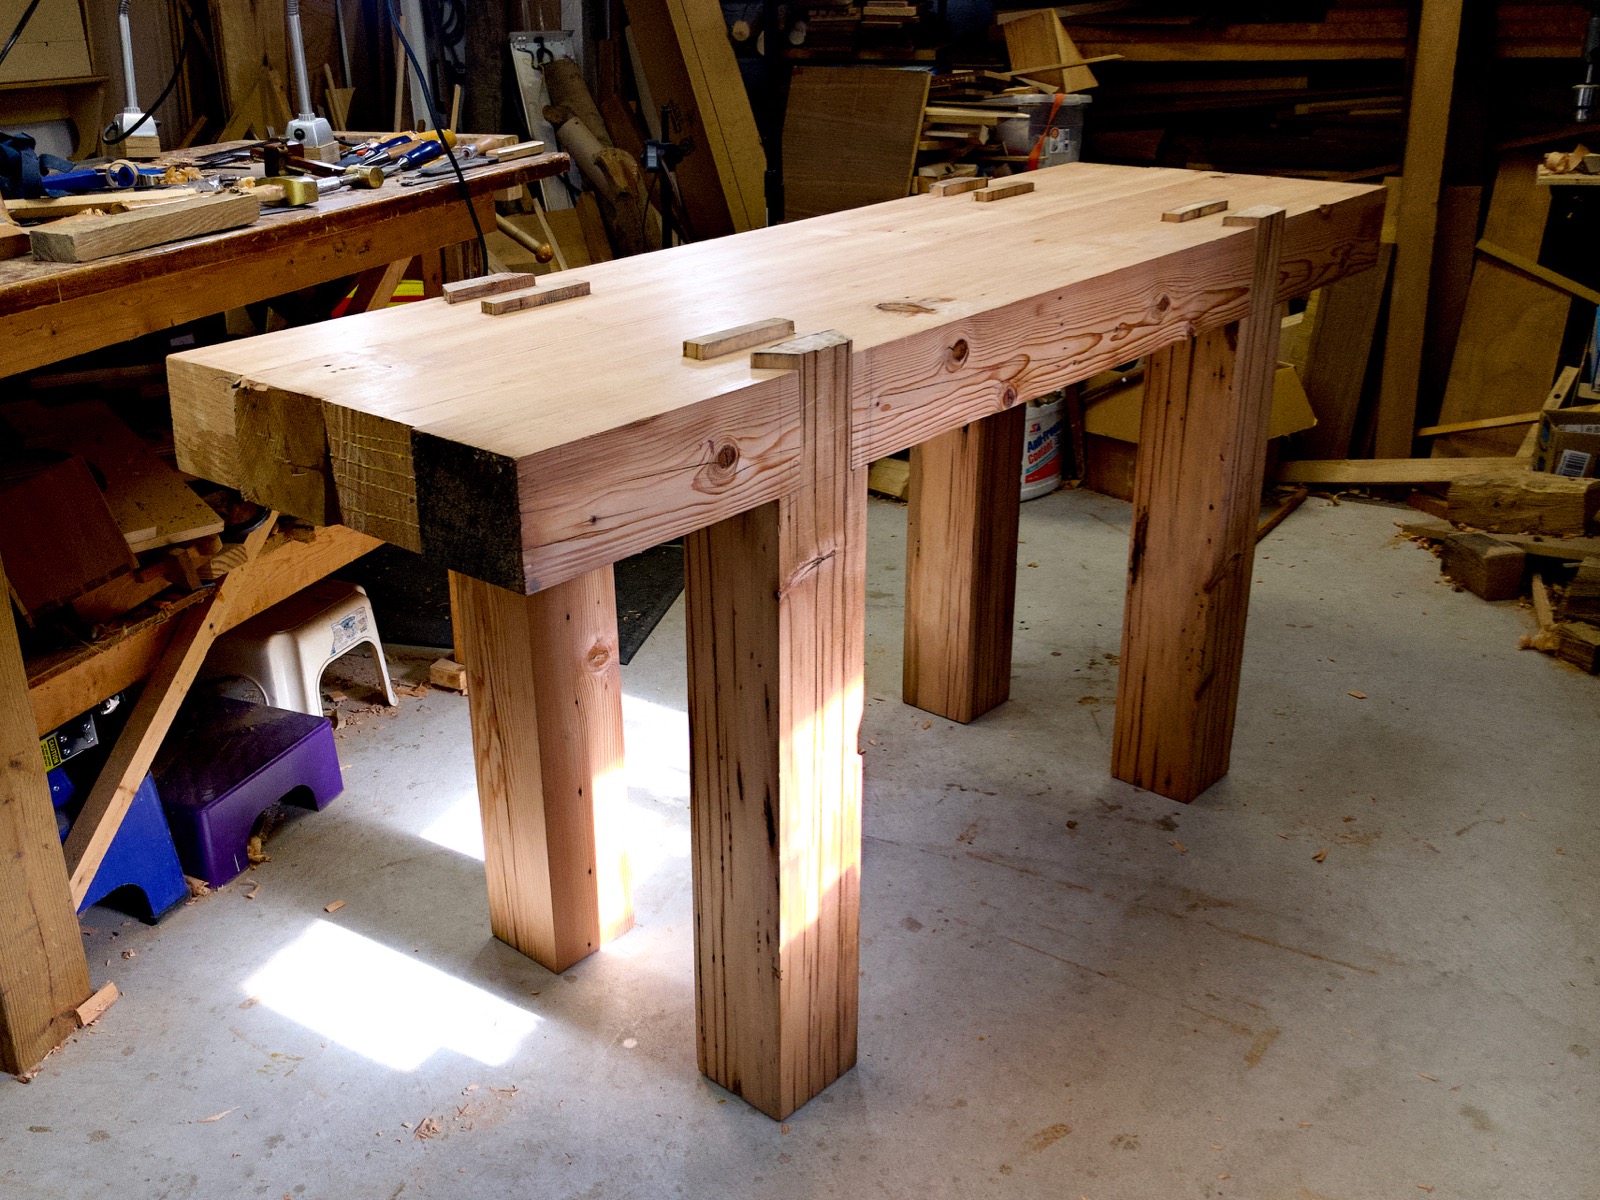
The bench is starting to look like a real bench. This was a great milestone for the build.
On to the stretchers next.
-Eric
